Leading manufacturer and supplier of ready mix concrete, liquid screed and concrete pumps for the South West
  • Variety of dimensions available
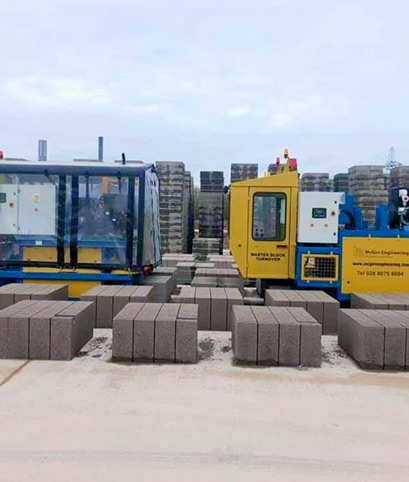
  • Manufactured on site
  • Available for delivery or collection
  • Request a quote

Types of Concrete Blocks

Not all concrete blocks are the same. They might look similar on a pallet, but the type you choose affects how a wall performs and the load it carries.

There are several types of concrete blocks on the market, and each suits a different job. Some are built for strength, carrying floors and roofs, while others insulate a home. Knowing the different types of concrete blocks before you order helps avoid costly mistakes.

At Wright Readymix, we manufacture blocks at our own plant. They're available for collection or delivery, so call 0117 958 2090 or fill out our online form.

Concrete Blocks by Density: Dense Aggregate vs Lightweight


The first big distinction is density, and it comes down to the aggregate used. Dense concrete blocks use heavier aggregates such as crushed stone or gravel, giving them strength and mass. They perform well under load and offer good sound insulation, so builders often choose them for party walls.

Lightweight blocks swap that heavy aggregate for something lighter, such as expanded clay or recycled material. They are easier to handle and quicker to lay, though they will not match a dense block for raw strength or sound deadening.

Choosing between dense vs lightweight concrete blocks comes down to the job. Need maximum strength? Dense is the way to go. Want speed and a lighter unit? Lightweight is often better. It is one of the fundamental decisions you will make early on when evaluating types of concrete blocks. Our concrete block manufacturers page has the full detail on our Avonmouth plant.

Solid vs Hollow Concrete Blocks


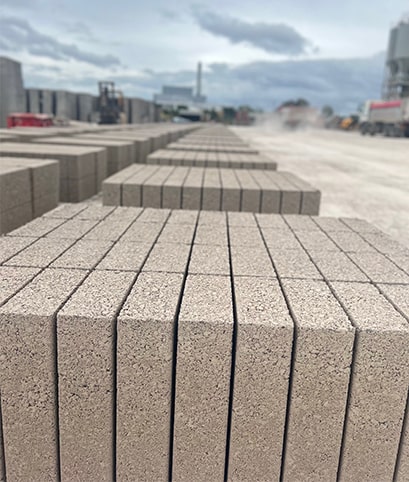
Beyond density, blocks also differ in whether they're solid all the way through or cast with cavities in the centre. Solid blocks are exactly what they sound like, with no voids, just concrete from face to face. That makes them the natural choice for load-bearing walls, foundations, and anywhere structural performance is non-negotiable.

Hollow blocks have voids cast into them, which cuts down both weight and material use. Builders use them for internal partitions, non-load-bearing walls, and any wall that doesn't need to carry much weight above it. The trade-off is simple: less material means a lighter, cheaper block, but less strength than its solid counterpart.

When people ask us about solid vs hollow concrete blocks, we usually start by asking what the wall needs to do. A below-ground retaining wall calls for something very different to a partition inside a house, and getting this wrong at the specification stage causes problems later. It's a good example of why different types of concrete blocks exist in the first place, as each one is built for a specific structural role.

concrete block supplier

concrete blocks supplier

Concrete Block Strength Classes Explained: 7N, 10N, 17N and Beyond


Strength class gets technical, but it's worth knowing because it decides what a block is approved for. Blocks are rated by compressive strength, measured in newtons per square millimetre, and this number tells you how much load a block can take before it fails. Among all the types of concrete blocks available, strength class is probably the spec builders ask about most.

7N Concrete Blocks

7N concrete blocks are the everyday workhorse of UK construction. With a compressive strength of 7 newtons per square millimetre, they are strong enough for most domestic load-bearing walls, including foundations and general house building. They are also easy to handle and lay on site, which keeps labour costs down.

Builders reach for 7N blocks time and again because they strike a reliable balance between strength, weight, and price, and they meet the requirements for most single and two-storey domestic projects.

10N Concrete Blocks

Step up from there and you will find 10N concrete blocks. These offer extra strength for jobs where a standard 7N block is not quite enough, such as taller structures, exposed sites, or trickier ground conditions that place more load through the wall.

They sit as a popular middle ground between domestic and heavier commercial work, giving contractors a margin of safety without a full commercial specification. If you are unsure whether your project needs 10N, our team can check.

17N Concrete Blocks and Beyond

At the top end, 17N concrete blocks and higher classes suit demanding commercial or industrial jobs. Think multi-storey structures, heavy-duty flooring, or foundations carrying substantial loads, where the wall must perform reliably under sustained pressure.

Classes do not stop at 17N either. Some projects call for even higher rated blocks depending on structural calculations and building control requirements, and that is when it pays to talk to a manufacturer directly rather than guess. We can confirm the right class for your specification.

Not sure which strength class your project needs? Our team can talk you through it before you order, so you're not left guessing once the blocks are on site.

Aircrete and Aerated Concrete Blocks


Aircrete blocks, also called aerated concrete blocks, are a different animal altogether. Tiny air bubbles are added to the mix before it cures, giving the finished block a much lower density than standard dense or lightweight blocks. That air is exactly what makes them useful. It traps heat far more effectively than a solid block ever could.

This is why aircrete is so common in modern cavity wall construction, especially for the inner leaf, where insulation matters more than raw compressive strength. Aircrete blocks are also lighter to handle, which speeds up work on site. They're usually kept for non-load-bearing or lightly loaded jobs rather than heavy structural work.

Among the many types of concrete blocks a builder might specify, aircrete is worth considering wherever energy efficiency is a priority, alongside good insulation elsewhere in the build.

Which Type of Concrete Block Do I Need?


With so many types of concrete blocks to choose from, it helps to think about the application first, rather than the spec sheet. Here's a quick guide:

  • Load-Bearing Walls: Solid dense blocks, typically 7N concrete blocks or above depending on the load, give these walls the strength they need.
  • Cavity Wall Inner Leaf: Aircrete blocks are usually the better choice, trading some strength for much better thermal performance.
  • Internal Partitions: Hollow or lightweight blocks do the job without adding unnecessary weight or cost.
  • Below-Ground Work: Dense blocks, often specified at 10N concrete blocks or higher depending on ground conditions, cope better with moisture and sustained loading.
  • Garden Walls and Boundary Work: A standard dense block is usually enough, though taller or retaining structures may need a higher strength class.

Get the Right Block Before You Order


Specifying the right block shouldn't be guesswork. The good news is that it's not something you need to work out alone. Our team at Wright Readymix has the practical knowledge to match the block to the job, whether that's a straightforward domestic build or a demanding commercial specification.

Give us a call on 0117 958 2090 and we'll talk through what you need. Or fill in our contact form and a member of the team will get back to you. Either way, you'll have the right block for the job before a single pallet leaves our plant.

Concrete Block Type FAQs


Yes, different block types can sometimes be used in different sections of the same wall, but the arrangement must be compatible with the structural design, exposure conditions, moisture protection, coursing and finish.

For example, dense or specially approved blocks may be used in more exposed or below-ground locations, with aircrete used above the damp-proof course where appropriate. Always follow the designer’s specification and the block manufacturer’s guidance.

Yes, most concrete blocks can be cut on site using a block splitter or suitable masonry-cutting equipment. A diamond-bladed saw can provide a clean cut, but cutting concrete blocks can generate respirable crystalline silica dust.

Use pre-cut units where possible and control dust at source with wet cutting or effective on-tool extraction. Follow the risk assessment and HSE guidance, including suitable eye protection and fit-tested RPE where required.

It depends on the block, its position and the exposure conditions. Internal blockwork may be plastered, dry-lined or left exposed where appropriate. External blockwork may be left fair-faced only when the block is specifically suitable for that use; otherwise it will normally require a compatible render, cladding or other weatherproof finish.

Below-ground walls require suitable moisture protection and detailing, which may include tanking, waterproofing or drainage. Always check the block and finish manufacturer’s instructions.

Concrete masonry is generally non-combustible and can provide good fire resistance. However, the fire-resistance period depends on the complete wall construction, including block type, thickness, density, loading, finishes, joints and penetrations. Where a specific rating is required, check the tested or declared performance of the proposed wall system and the project’s fire strategy.

Lightweight and aircrete blocks are not automatically unsuitable for wet or below-ground locations. Some products are certified for use below the damp-proof course and in specified soil, groundwater and exposure conditions, while others are not.

Check the exact product certification and manufacturer’s installation guidance, and ensure that damp-proofing, drainage, mortar and protection are designed for the site conditions. Dense blocks may be suitable, but they are not automatically appropriate in every case.

We are the right people for you – let’s work together!


Contact us on 0117 958 2090 today to get a quote or to find out more.

News
How Much Decorative Gravel Do I Need for My Garden?
28th August 2026

Ordering gravel is one of those jobs that looks simple enough, until you're stood at the checkout wondering whether three bags will cover it or you'll be halfway through a driveway with an empty pallet and a Saturday afternoon disappearing. Order too little and you're paying for a second delivery and losing a day waiting for it. Order too much and you've got bags of stone sat on the drive for months, or money spent on gravel you'll never use.

Getting the quantity right the first time comes down to a bit of maths rather than guesswork, and it's more straightforward than most people expect once you know what to measure and why.

What Determines How Much Decorative Gravel You Need?

How much decorative gravel do I need? Three things drive the answer, and all three have to be worked out together rather than in isolation. The first is the area you're covering, measured in square metres. The second is the depth, which changes depending on whether it's a border, a path, or somewhere vehicles will drive over. The third is the type of gravel itself, since different stone sizes and densities cover different amounts per tonne.

A bed of garden gravel around shrubs needs far less depth than a driveway that has to withstand repeated vehicle loads, so treating every area the same is where most ordering mistakes start. Get this part right and the rest of the calculation is just arithmetic.

How to Calculate Gravel Coverage for Your Space

Once you know your area and your intended depth, working out gravel coverage follows a set process. It's the same method whether you're doing a small border or a full driveway, just with different numbers going in:

  • Measure the Area: Work out the length and width of the space in metres, then multiply them together to get the area in square metres. For irregular shapes, break the area into smaller rectangles and add the totals together.
  • Decide on Your Depth: Convert your chosen depth from millimetres or centimetres into metres, since the coverage calculation needs consistent units throughout.
  • Multiply Area by Depth: This gives you the volume in cubic metres, which is what suppliers use to calculate, making it easy to answer the question, ‘how much decorative gravel do I need for the job?’.
  • Convert to Weight: Most gravel is sold by the tonne, so multiply the volume by the bulk density of the stone (typically around 1.5 to 1.6 tonnes per cubic metre for standard aggregates) to get the weight you need to order.
  • Add a Small Margin: It's sensible to order five to ten per cent extra to allow for an uneven base or settling once the gravel is down.

Depth Calculation: Getting the Right Depth for Different Areas

Depth calculation isn't a fixed number across every project, because different areas of the garden do different jobs and need different amounts of stone underneath them. A decorative border or planted bed generally only needs 25 to 40mm of gravel, since it's there for appearance rather than to bear weight.

Paths that people will walk on regularly tend to need 40 to 50mm, giving enough coverage to stop the base showing through as the gravel gets displaced over time. Meanwhile, areas that need to bear vehicle weight, such as parking spaces, require a proper sub-base along with 50 to 75mm of surface gravel to stop rutting and movement.

Getting this depth calculation wrong in either direction causes problems: too shallow and the base shows through within weeks, too deep and you've spent more than the job needed, so it's worth measuring twice before you order.

Driveway Gravel vs Garden Gravel: Why Coverage Differs by Use

Driveway gravel and garden gravel aren't interchangeable, and treating them as the same product when you're calculating quantities is a common source of under-ordering. Driveway gravel needs to be angular rather than rounded, so the stones lock together under the weight of a vehicle instead of shifting and scattering, and it's typically laid thicker over a compacted sub-base to spread the load properly.

Garden gravel, used in borders and planted areas, can be a rounded or decorative aggregate chosen more for appearance than performance, and it sits at a shallower depth since it isn't carrying any load. Because the depth and stone type differ, the tonnage per square metre differs too, so a calculation done for a border won't transfer directly to a driveway of the same size. Always calculate the two areas separately, even if they're part of the same overall project.

Understanding Bulk Bag Sizes and Coverage

Buying in bulk bags rather than smaller bags is usually the more economical route for anything beyond a small border, but it helps to know what you're getting before you order. A standard bulk bag typically holds around 850kg to a tonne of aggregate, though this varies slightly by supplier and stone type, so it's worth checking gravel coverage figures against the specific bag you're buying:

  • Small Bulk Bag (approx. 850kg): Covers roughly 10 to 12 square metres at a 50mm depth, suited to modest borders or small paths.
  • Standard Bulk Bag (approx. 1 tonne): Covers roughly 12 to 14 square metres at a 50mm depth, the most common choice for garden projects and smaller driveways.
  • Multiple Bulk Bags: For larger driveways or extensive coverage, ordering several bulk bags together is usually more cost-effective than a series of smaller deliveries, and reduces the number of separate trips needed on site.

Avoiding Over-Ordering and Wastage

The most common cause of wastage isn't poor gravel; it's a depth calculation that didn't account for how the ground sits. Sloped or uneven areas need more careful measurement, since a flat calculation based on length and width alone can under-read the true volume once contours are factored in.

It's also worth checking whether your driveway gravel or garden gravel needs a weed membrane or sub-base first, since skipping that step often means gravel disappearing into soft ground and needing topping up within a season, which defeats the purpose of an accurate order in the first place.

How much decorative gravel do I need for a project with mixed areas? Calculate each zone separately rather than averaging across the whole garden, since border depths and driveway depths pull the average in different directions and rarely give an accurate total. A few extra minutes at the calculation stage saves a second delivery later.

Order the Right Amount of Gravel, First Time

At Wright Readymix, we supply decorative and functional aggregates in bulk bags across the South West of England and South Wales, alongside our ready mix concrete, concrete pumping, concrete blocks, and Wrightflow liquid screed services. If you're not confident in your measurements or want a second opinion before you order, give us a call on 0117 958 2090 and we'll talk you through the quantities for your project, or get in touch via our contact form and we'll come back to you.

Read more
Does Sunlight and Heat Damage Concrete Driveways UK?
10th August 2026

A hot summer brings out the worry: is all that sun going to leave your driveway cracked, faded, or worse? It's a fair question. Concrete looks tough, but it's still a material that responds to its environment, and the UK's mix of intense summer heat spells and long grey stretches puts it through more than most homeowners realise.

Therefore, it’s key to recognise what the sun and heat actually do to a concrete surface, where the real risks lie, and why this makes it much easier to know what's worth worrying about and what isn't.

Does Sunlight Really Damage a Concrete Driveway?

The short answer is that sunlight on its own rarely causes structural harm to a well-laid concrete driveway. Concrete is a dense, mineral-based material, not a polymer or a dye that breaks down under light the way plastic or fabric can.

What sunlight can do, over years of exposure, is contribute to surface-level changes such as fading and a slight chalky texture as the very top layer weathers. This is cosmetic rather than a sign that the slab itself is failing. However, sunlight paired with heat, moisture cycles, and existing weaknesses in the mix or the sub-base can damage concrete, and this is where the real concerns begin to show.

On its own, UV exposure is a slow, surface-only process. Combined with the freeze-thaw and heat-expansion cycles typical of a British year, it becomes one factor among several rather than the main cause of any serious problem.

How UV Exposure Affects Concrete Over Time

UV exposure works gradually, and its effects are mostly visible rather than structural. Over several years, constant sun can lighten the surface colour of a driveway, particularly on darker or coloured concrete, as UV light breaks down pigments and the top few millimetres of cement paste.

You might also notice a slightly rougher or dustier finish develop on unsealed concrete, since UV exposure accelerates the natural weathering of the surface binder. This is different from the damage concrete sustains due to structural movement or poor installation. It's a slow fade rather than a defect.

South-facing driveways and those with little tree cover will show these signs earliest, simply because they receive the most direct sun over the course of a year. None of this affects the load-bearing capacity of the slab, but it does explain why an older, unsealed driveway can look tired even when it's structurally sound.

Thermal Expansion and Why Concrete Reacts to Heat

Concrete expands as it heats and contracts as it cools, and this thermal expansion is normal behaviour built into how every driveway is designed. Expansion joints are placed at intervals specifically to give the slab room to move without cracking. Problems tend to arise not from the expansion itself but from restricted movement, whether that's a joint that's failed, been filled solid, or was spaced too far apart when the driveway was laid.

In the UK, the risk isn't extreme heat on its own, since our summer temperatures rarely reach the levels seen in hotter climates, but the swing between a cold night and a hot afternoon during a heatwave. That daily cycle of expansion and contraction, repeated over years, is more likely to damage concrete than any single hot day. A driveway with correctly spaced, well-maintained joints handles this movement without issue.

Spotting the Signs of Heat Stress on Your Driveway

Heat stress shows up in fairly recognisable ways, and catching it early makes any repair simpler and cheaper. Look out for:

  • Hairline Cracks Near Joints or Edges: Fine cracks that appear close to expansion joints or the slab's outer edges often indicate the joint isn't accommodating movement as it should.
  • Slight Surface Buckling or Lifting: A section that feels uneven underfoot, particularly near a boundary or wall, can point to restricted thermal expansion pushing the slab upward.
  • Colour Patches or Blotching: Uneven fading in specific areas, rather than an overall gradual change, may signal a hotter microclimate on that section, for example next to a south-facing wall that reflects extra heat.
  • Widening of Existing Cracks During Hot Weather: Cracks that visibly open up further on very hot days and close again once it cools are a clear sign of thermal expansion at that point.

None of these are usually urgent, but they're worth noting and monitoring, since heat stress that's left unaddressed tends to worsen with each seasonal cycle rather than resolve on its own.

Does Sun Damage Affect Long-Term Durability?

For a driveway laid correctly with the right mix design and adequate joint spacing, sun and heat exposure alone won't meaningfully shorten its lifespan. The bigger threats to long-term durability are moisture getting into surface cracks and then freezing, poor drainage that leaves water sitting on the slab, and heavy loads on a base that wasn't specified for them.

Heat stress becomes a durability issue mainly when it works alongside one of these other factors, for example when a crack opened by thermal movement then lets water in, which will damage concrete far more over a winter than the original crack did on its own. Surface sealing plays a useful role here, since a sealed surface sheds water more effectively and reduces how much moisture reaches any small cracks in the first place.

Left unsealed and unmaintained over ten or more years, a driveway will show more wear from cumulative UV and thermal cycling, but this is a gradual cosmetic and minor structural decline rather than sudden failure.

Preventing Damage: Surface Sealing and Driveway Maintenance

Most sun and heat-related wear is manageable with a modest, regular maintenance routine rather than anything drastic. The most effective steps are:

  • Apply a Concrete Sealer Every Two to Three Years: Surface sealing protects against UV fading and reduces water absorption, which in turn limits freeze-thaw damage.
  • Check Expansion Joints Annually: Make sure joint filler hasn't perished or come loose, and top it up if it has, so the slab can still move as intended.
  • Clean the Surface Regularly: Removing dirt, moss, and organic growth stops moisture being trapped against the concrete in shaded or damp spots.
  • Address Small Cracks Promptly: A hairline crack filled early is far cheaper than the wider repair needed once water and repeated thermal cycling have made it worse.
  • Improve Drainage Where Water Pools: Standing water accelerates almost every other form of wear, so redirecting it away from the slab protects against heat, frost, and general driveway maintenance issues alike.

Kept up consistently, this routine will keep a concrete driveway performing well through decades of UK summers and winters alike.

Protect Your Driveway Before Summer Takes Its Toll

A concrete driveway is built to handle sun, heat, and everything the British climate throws at it, but a little seasonal attention goes a long way toward keeping it looking and performing as it should. Regular driveway maintenance, starting with a proper sealing routine, is the simplest way to stay ahead of fading, cracking, and moisture damage before they set in.

If you're planning a new driveway or want advice on maintaining an existing one, get in touch with Wright Readymix. Call us on 0117 958 2090 or fil out our contact form online to discuss the right approach for your property.

Read more
What Is the Best Aggregate for Driveways & Shed Bases?
29th July 2026

The driveway looked good going down. The gravel was the right colour, the edging was straight, and the whole job was done in a day. Six months later, the sub-base had shifted, the surface was rutting under the car, and the whole thing needed lifting. The aggregate itself was fine. The problem was what went under it.

Choosing the best aggregate for driveways and shed bases is not complicated, but it does require knowing what each material is actually for. Load-bearing and drainage drive every decision. A vehicle-trafficked surface needs a sub-base that compacts hard and locks under repeated weight. A shed base needs a platform that sheds water and holds level. Get either wrong and no amount of careful finishing saves it.

This guide covers the materials that matter, the depths that work, and the mistakes that cost people twice.

What Type 1 & Type 2 Aggregate Do Differently

Type 1 and Type 2 are both unbound granular sub-base materials. They behave differently under load in ways that matter to anyone building a driveway.

Type 1 is well-graded crushed stone with a controlled proportion of fines that lock it together under compaction. That is the source of its load-bearing strength and why it is the standard sub-base for vehicle-trafficked surfaces. Construction Industry Research and Information Association's (CIRIA) susdrain guidance confirms that Type 1's high fines content makes it sensitive to moisture changes and largely impermeable, compared with open-graded materials chosen specifically to provide open voids [1].

Type 2 has fewer fines and compacts less tightly. It has a place under light pedestrian paving or as a drainage layer where water movement matters more than bearing capacity. Under a driveway, it is the wrong choice.

When To Use Type 2 Instead

Type 2 earns its place beneath soakaways, around French drains, or as an open-graded fill in a permeable driveway system. For any surface a vehicle will cross, Type 1 is correct. Using Type 2 beneath a driveway is a common and expensive mistake.

What Gravel Actually Stops a Driveway from Moving

A loose-gravel driveway that migrates onto the pavement or churns into ruts has almost always been built with the wrong material or a skimped sub-base. The surface gravel is rarely the issue. The problem sits underneath it.

Surface material matters too. Rounded materials like pea shingle roll against each other and never truly interlock. Angular crushed stone grips; compact it properly, and it holds position under wheel loads.

Ministry of Housing, Communities and Local Government (MHCLG) guidance on permeable surfacing of front gardens sets out the correct build sequence. It specifies a geotextile membrane at the base, a minimum 200mm of compacted open-graded sub-base, then approximately 50mm of decorative gravel at the surface. Conventional Type 1 contains sand and silt that blocks water movement, which is why open-graded materials are used in permeable systems instead [2].

Since October 2008, any impermeable front garden driveway over 5 square metres needs planning permission unless water drains to a permeable area. Gravel is permeable and does not trigger this. Ten-millimetre angular gravel gives a tighter finish underfoot; 20mm drains better and holds more effectively under tyres.

On softer or clay ground, the depth and specification for a sub-base changes. The same principles apply when choosing aggregates for hardscaping projects, where drainage and load-bearing sit alongside aesthetic choices.

Our aggregate and gravel range is available in bulk bags with delivery across Bristol, Bath, Cheddar, Avonmouth, Newport, and the wider South West.

How Thick a Gravel Base Actually Needs to Be for A Shed

The shed base that fails is almost always one that was compacted by someone standing on it and deciding it felt firm enough. It never is. Ask any groundworker who has lifted a sunken shed six months after the pour.

For a standard timber shed, work through the sequence in order:

  • Excavate topsoil down to firm ground and lay a weed membrane.
  • Add compacted Type 1 sub-base across the full footprint.
  • Top with levelled 20mm angular gravel, extended 50mm beyond the walls.

The Planning Portal's guidance on outbuilding foundations confirms that soil type is a significant factor in both depth and design. Clay soils expand and contract with moisture changes, affecting base performance over time. On firm ground, 100mm of compacted Type 1 is the working minimum; 150mm on soft or clay ground, or for heavier structures [3].

Gravel Base or Concrete: Which Is Right for A Shed?

Gravel drains freely, installs quickly, and needs no curing time. On soft ground, sloping sites, or under a heavy structure, a concrete slab is the more reliable choice. What neither will forgive is poor compaction. Compact in layers, check for level in both directions, and get it right before the shed goes on.

If you are moving from a gravel base to a concrete slab, the preparation sequence changes. Laying concrete correctly starts well before the truck arrives. The sub-base condition, formwork, and weather all affect the finished result.

The Decisions that Hold

Most driveway and shed base failures trace back to one of three choices made early in the job. Wrong sub-base material, rounded stone where angular should have gone, or a base compacted by eye rather than by depth. None of these mistakes is obvious at the time. They show up six months later, once load and water have done their work.

The three things that matter most:

  • Type 1 sub-base compacts hard and carries load; Type 2 does not.
  • Angular gravel interlocks under traffic; rounded stone migrates.
  • Compacted depth, not decorative depth, keeps a base level long-term.

Wright Readymix supplies 17 aggregate and gravel options in bulk bags, delivered across Bristol, Bath, Avonmouth, Cheddar, Newport, and Weston-super-Mare. The team can advise on material selection before you order, whether for a driveway, a shed base, or a larger groundworks job.

Call 0117 958 2090 or get in touch to discuss your aggregate requirements.

External Sources

[1] Construction Industry Research and Information Association (CIRIA), Structural Performance: https://www.susdrain.org/delivering-suds/using-suds/suds-components/source-control/pervious-surfaces/pervious-surface-types/structural-performance.html

[2] GOV.UK, Ministry of Housing, Communities and Local Government (MHCLG), Guidance on the Permeable Surfacing of Front Gardens (2026): https://www.gov.uk/government/publications/permeable-surfacing-of-front-gardens-guidance/guidance-on-the-permeable-surfacing-of-front-gardens

[3] GOV.UK, Planning Portal, Building Regulations: Foundations: https://www.planningportal.co.uk/permission/common-projects/outbuildings/building-regulations-foundations

Read more
Does Hot Weather Affect Curing a Concrete Shed Base?
15th July 2026

A hot spell might feel like ideal pouring weather, but it is exactly when curing a concrete shed base gets hardest to do properly. Heat pulls moisture from the surface faster than the concrete underneath can build strength, so a slab that looks dry by lunchtime can still crack within the week. Leave it uncovered on a warm afternoon, and you risk plastic shrinkage cracking, a soft core under a hard crust, or a slab that fails months later.

None of that is inevitable. Get the concrete for a shed base right at the ordering stage, then time the pour and protect the surface while it cures. Do this and you’re assured of a summer pour holds just as reliably as one poured in spring.

The difference between a base that lasts and one that cracks comes down to a handful of decisions made on day one.

Why Hot Weather Speeds Up Drying without Speeding up Strength

Heat, wind and low humidity all pull moisture out of a slab faster, but the concrete underneath still needs its full curing time to gain strength. That mismatch, a dry crust over a soft core, is what causes plastic shrinkage cracking on shed bases poured in summer. Higher temperatures also speed up cement hydration, giving a slab that feels strong early on at the cost of its long-term strength.

This summer has already brought a run of exceptional heat. The Met Office confirmed a record eight days above 34°C this year, the first on record with 35°C readings across May, June and July. A shed base with no shade will run hotter still [1].

BS 8500 sets a 35°C limit on concrete temperature at discharge for three reasons [2]:

  • Loss of workability, making the mix harder to place and compact.
  • Faster evaporation than strength gain, causing shrinkage cracks.
  • Thermally induced stress as the slab cools, raising cracking risk.

Why Fast Surface Drying Isn't Fast Curing

Wind and low humidity make the evaporation problem worse still, since both speed up moisture loss regardless of the air temperature. The mechanics of how concrete cures don't change with the weather; only the timing does.

Time Your Pour Before the Sun Gets to It

The biggest lever you have over hot weather curing is when you pour. The British Ready-Mixed Concrete Association’s (BRMCA) practical guide for site personnel sets a two-hour limit between loading and placing ready-mixed concrete, shorter still in hot weather. Heat speeds up how fast the concrete loses workability, so a stiff mix at the chute is one you're fighting rather than placing [3].

Shed bases aren't the only pour that suffers in this weather. The same discharge window and admixture questions apply to any pour scheduled during a heatwave.

However, if it's a scorching day, ask your supplier whether the load needs a retarding admixture at the plant to buy more working time. Flag it if your mix is air-entrained too, since entrained air turns unstable above 30°C, five degrees below the general limit, so delivery temperature needs tighter control.

Order for early morning delivery, as the concrete's most vulnerable hours land before the day's heat peaks rather than during it. Get the site ready before the truck is due, and the early-morning slot does its job properly.

A few things are worth locking down before the truck arrives:

  • Confirm your delivery slot for early morning, before eight.
  • Have shading or covers ready before finishing work is done.
  • Ask your supplier if a retarding admixture is worth adding.

None of this changes the mix itself. It just buys the concrete time to cure before the heat starts working against it.

Protect a Freshly Poured Base While It Cures

Once the base is placed, the job is keeping moisture in, not adding more on top. Covering the slab, shading it and controlling rewetting keeps enough water in the mix to cure properly, not just look dry on top.

Good curing, not a stronger mix, reduces drying shrinkage cracks, according to the Concrete Society, by giving the concrete more time to build strength before it dries out. Shrinkage happens in the cement paste, not the aggregate, which is why managing how it dries does more to prevent cracking than anything added to the mix [4].

3 Habits That Undo an Otherwise Good Pour

  • Hosing the surface down mid-afternoon to cool it off.
  • Leaving the sheeting off overnight because the day felt cool enough.
  • Removing formwork early because the surface looks set.

If this is a first shed base pour, our guide on preparing a shed base covers prep done for April conditions rather than August ones.

Getting It Right Despite the Heat

Before this, hot weather curing probably looked like one more risk on a job you were already unsure about. After it, the plan is straightforward, and it comes down to three habits rather than luck. Follow them, and a slab poured in August cures just as reliably as one poured in April, only with more attention along the way.

The steps that matter most:

  • Pour first thing in the morning, before the heat builds.
  • Cover the base and keep the sheeting on overnight.
  • Leave the hose alone, however dry the surface looks.

Wright Readymix has supplied ready-mixed concrete and advice on jobs like this across the South West and South Wales for years, from small domestic pours to full commercial slabs. Our team talks through mix, volume and delivery timing before you book, then follows through on delivery day too. That matters most when the weather is working against the pour rather than with it.

Call 0117 958 2090 or get in touch to talk through timing and delivery for a shed base pour in hot weather.

External Sources

[1] GOV.UK, Met Office, Heatwave Continues as UK Records Unprecedented Run of 35°C Days (2026): https://www.metoffice.gov.uk/about-us/news-and-media/media-centre/weather-and-climate-news/2026/heatwave-continues-as-uk-records-unprecedented-run-of-35c-days

[2] Concrete Society, Hot Weather Concreting (2025): https://www.concrete.org.uk/fingertips/hot-weather-concreting/

[3] British Ready-Mixed Concrete Association (BRMCA), Ready Mixed Concrete – Practical Guide for Site Personnel (2017): https://brmca.org.uk/documents/BRMCA_Ready_Mixed_Concrete_Practical_guide_October_2017.pdf

[4] Concrete Society, Reducing Drying Shrinkage Cracks (2025): https://www.concrete.org.uk/fingertips/reducing-drying-shrinkage-cracks/

Read more