


A hot spell might feel like ideal pouring weather, but it is exactly when curing a concrete shed base gets hardest to do properly. Heat pulls moisture from the surface faster than the concrete underneath can build strength, so a slab that looks dry by lunchtime can still crack within the week. Leave it uncovered on a warm afternoon, and you risk plastic shrinkage cracking, a soft core under a hard crust, or a slab that fails months later.
None of that is inevitable. Get the concrete for a shed base right at the ordering stage, then time the pour and protect the surface while it cures. Do this and you’re assured of a summer pour holds just as reliably as one poured in spring.
The difference between a base that lasts and one that cracks comes down to a handful of decisions made on day one.
Why Hot Weather Speeds Up Drying without Speeding up Strength
Heat, wind and low humidity all pull moisture out of a slab faster, but the concrete underneath still needs its full curing time to gain strength. That mismatch, a dry crust over a soft core, is what causes plastic shrinkage cracking on shed bases poured in summer. Higher temperatures also speed up cement hydration, giving a slab that feels strong early on at the cost of its long-term strength.
This summer has already brought a run of exceptional heat. The Met Office confirmed a record eight days above 34°C this year, the first on record with 35°C readings across May, June and July. A shed base with no shade will run hotter still [1].
BS 8500 sets a 35°C limit on concrete temperature at discharge for three reasons [2]:
- Loss of workability, making the mix harder to place and compact.
- Faster evaporation than strength gain, causing shrinkage cracks.
- Thermally induced stress as the slab cools, raising cracking risk.
Why Fast Surface Drying Isn't Fast Curing
Wind and low humidity make the evaporation problem worse still, since both speed up moisture loss regardless of the air temperature. The mechanics of how concrete cures don't change with the weather; only the timing does.
Time Your Pour Before the Sun Gets to It
The biggest lever you have over hot weather curing is when you pour. The British Ready-Mixed Concrete Association’s (BRMCA) practical guide for site personnel sets a two-hour limit between loading and placing ready-mixed concrete, shorter still in hot weather. Heat speeds up how fast the concrete loses workability, so a stiff mix at the chute is one you're fighting rather than placing [3].
Shed bases aren't the only pour that suffers in this weather. The same discharge window and admixture questions apply to any pour scheduled during a heatwave.
However, if it's a scorching day, ask your supplier whether the load needs a retarding admixture at the plant to buy more working time. Flag it if your mix is air-entrained too, since entrained air turns unstable above 30°C, five degrees below the general limit, so delivery temperature needs tighter control.
Order for early morning delivery, as the concrete's most vulnerable hours land before the day's heat peaks rather than during it. Get the site ready before the truck is due, and the early-morning slot does its job properly.
A few things are worth locking down before the truck arrives:
- Confirm your delivery slot for early morning, before eight.
- Have shading or covers ready before finishing work is done.
- Ask your supplier if a retarding admixture is worth adding.
None of this changes the mix itself. It just buys the concrete time to cure before the heat starts working against it.
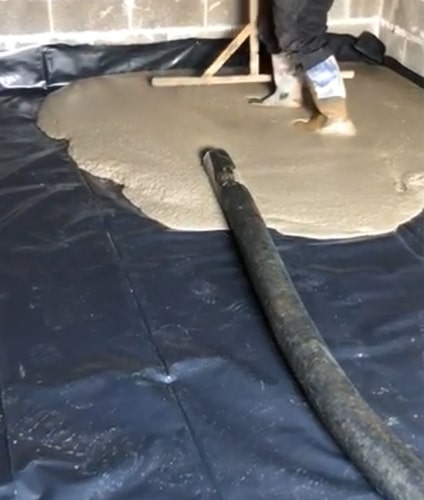
Protect a Freshly Poured Base While It Cures
Once the base is placed, the job is keeping moisture in, not adding more on top. Covering the slab, shading it and controlling rewetting keeps enough water in the mix to cure properly, not just look dry on top.
Good curing, not a stronger mix, reduces drying shrinkage cracks, according to the Concrete Society, by giving the concrete more time to build strength before it dries out. Shrinkage happens in the cement paste, not the aggregate, which is why managing how it dries does more to prevent cracking than anything added to the mix [4].
3 Habits That Undo an Otherwise Good Pour
- Hosing the surface down mid-afternoon to cool it off.
- Leaving the sheeting off overnight because the day felt cool enough.
- Removing formwork early because the surface looks set.
If this is a first shed base pour, our guide on preparing a shed base covers prep done for April conditions rather than August ones.
Getting It Right Despite the Heat
Before this, hot weather curing probably looked like one more risk on a job you were already unsure about. After it, the plan is straightforward, and it comes down to three habits rather than luck. Follow them, and a slab poured in August cures just as reliably as one poured in April, only with more attention along the way.
The steps that matter most:
- Pour first thing in the morning, before the heat builds.
- Cover the base and keep the sheeting on overnight.
- Leave the hose alone, however dry the surface looks.
Wright Readymix has supplied ready-mixed concrete and advice on jobs like this across the South West and South Wales for years, from small domestic pours to full commercial slabs. Our team talks through mix, volume and delivery timing before you book, then follows through on delivery day too. That matters most when the weather is working against the pour rather than with it.
Call 0117 958 2090 or get in touch to talk through timing and delivery for a shed base pour in hot weather.
External Sources
[1] GOV.UK, Met Office, Heatwave Continues as UK Records Unprecedented Run of 35°C Days (2026): https://www.metoffice.gov.uk/about-us/news-and-media/media-centre/weather-and-climate-news/2026/heatwave-continues-as-uk-records-unprecedented-run-of-35c-days
[2] Concrete Society, Hot Weather Concreting (2025): https://www.concrete.org.uk/fingertips/hot-weather-concreting/
[3] British Ready-Mixed Concrete Association (BRMCA), Ready Mixed Concrete – Practical Guide for Site Personnel (2017): https://brmca.org.uk/documents/BRMCA_Ready_Mixed_Concrete_Practical_guide_October_2017.pdf
[4] Concrete Society, Reducing Drying Shrinkage Cracks (2025): https://www.concrete.org.uk/fingertips/reducing-drying-shrinkage-cracks/